


Microsoft has evolved Exchange Server significantly over the years, from legacy versions like Exchange Server 2003 and 2007 to more recent editions such as 2016 and 2019. With the advancements in technology and the introduction of Exchange Server 2016 and 2019, the older versions have gradually reached their end of support.
Despite this, many organizations still rely on these outdated Exchange versions. Facing the reality of unsupported software, these organizations are now navigating the crucial task of migrating their data to newer, supported platforms like Exchange 2019. Therefore we have come up with the complete insight for migrating Exchange Server 2010 to 2019. Without any further discussion let’s get into it.
Brief About Microsoft Exchange Server
Microsoft Exchange Server is a messaging and collaborative software product developed by Microsoft. It operates as a mail server, calendaring software, and contact manager primarily used by organizations for email hosting, communication, and collaboration.
Exchange Server enables users to store and manage their emails, contacts, calendars, tasks, and other collaboration data centrally on servers within their organization’s network. It supports features like email synchronization across devices, shared calendars, global address lists, and integration with other Microsoft products such as Outlook and SharePoint.
How to Migrate Exchange Server 2010 Mailboxes to 2019?
Method 1. Cut-over migration: At a certain moment, the old system is completely and instantly replaced with the new one. Although it’s a simple and quick method, it does need careful preparation and cooperation to reduce downtime and guarantee a seamless transition.
Method 2. Staged migration: This type of migration entails moving functionality and data in stages, usually using intermediate versions. It lowers the possibility of serious problems by enabling testing and validation at every level. This is the method utilized for moving Exchange.
Method 3. Parallel migration: During a certain amount of time, the old and new systems operate concurrently to enable data synchronization and users acquainting themselves with the new system. Although there is less interruption and downtime, managing this calls for additional resources and complexity (Not supported in Exchange Server 2010 to 2019 because of coexistence).
Method 4. Trickle migration: Over time, data is moved in smaller batches while the previous system is still in use. This can be time-consuming and requires careful preparation, but it minimizes risk and permits continuing modifications (Not supported in Exchange Server 2010 to 2019 because of coexistence).
Method 5. Automated Software: If the manual methods overwhelm you, and you want to migrate in a more streamlined way, then you can opt for the automated software solution. It will not only reduce the overall cost and time but also minimize the chances of downtime.
Let’s discuss them in detail.
Manual Methods to Migrate Exchange Server 2010 Mailboxes to 2019
There are several migration methods available when moving from older Exchange Server versions to newer ones. However, for Exchange 2010 to 2019, only a staged migration is possible due to coexistence limitations between these versions.
Here is the method and outline for migrating using a staged migration as direct upgrades are not possible. Here are the steps for the process:
Note: You cannot directly migrate Exchange 2010 to 2019 by using manual method, first you need to migrate first Exchange 2010 to 2016 then upgrade 2016 to 2019.
1. Prepare for Staged Migration to Migrate from Exchange 2010 to 2019:
- Backup: Thoroughly back up your Exchange 2010 Mailbox environment in a .edb file format.
Check for necessary hardware and software requirements: Ensure that the hardware meets the minimum requirements for Exchange Server 2019. - Forest level check: Check for AD forest level. It must be the 2008 R2 or letter version
- Operating system: For migrating to Exchange 2016 the operating should be Windows 2012 and 2012 R2.
- Coexistence rule: Only 2010 SP3 RU11 is supported for coexistence with 2016 on another server.
Migration Process:
- Install new Windows 2012 (R2) servers
- Upgrade Active Directory Schema, Configuration Partition, and Domain Partition
- Install Exchange 2016 server farm
- Configure Virtual Directories
- Same namespace as Exchange 2010
- Import SSL Certificates
- Change the namespace to Exchange 2016
- Upgrade Exchange 2016 to 2019
2. Staged Migration Step By Step:
- Install UCMA Runtime: Firstly, download UcmaRuntimeSetup.exe. Launch UcmaRuntimeSetup.exe and follow the instructions to install. You can follow this command to download.
• Add-Windows Feature RSAT-ADDS
• Add-Windows Feature Desktop-Experience, Telnet-Client
• Telnet-Client is optional, useful for troubleshooting purposes
• Start-Bits Transfer -Source
http://download.microsoft.com/download/2/C/4/2C47A5C1-A1F3- 4843-B9FE-84C0032C61EC/UcmaRuntimeSetup.exe -Destination
c:\Download
• c:\Download\UcmaRuntimeSetup.exe/q - Migrate mailboxes to Exchange 2016: Secondly, use the Exchange Management Shell to migrate mailboxes from Exchange 2010 to Exchange 2016. Open cmd prompt as administrator: Enter these commands
• Setup.exe/PrepareSchema /IAcceptExchange ServerLicense Terms
• Setup.exe/PrepareAD/IAcceptExchangeServerLicense Terms
• Setup.exe /PrepareDomain/IAcceptExchange ServerLicense Terms
• Wait for replication to finish between all three steps! - Install the copied mailboxes:
• Setup.exe /Mode: Install /Roles: Mailbox/MdbName: AMS-EDB01/DbFilePath:F:\EDB01\EDB01.edb/LogFolderPath:F:\EDB01\LogFiles /InstallWindows Components/IAcceptExchange ServerLicense Terms - Upgrade to Exchange 2019: Finally, once all mailboxes are migrated, upgrade the Exchange 2016 server to Exchange 2019.
3. Disconnect or drop Exchange 2010:
After successfully migrating all data and functionality to Exchange 2019, decommission the Exchange 2010 server.
Note: Performing manual migration takes lots of time and effort and requires expertise any error can cause a data loss situation.
After following this step, you can migrate your mailbox from Exchange 2010 to 2019. You can also read how to migrate Exchange 2010, 2013, 2016, and 2019 to Office 365 by clicking on this link.
Straight Forward Method to Migrate Mailboxes From Exchange 2010 to 2019
By now, you have seen the manual migration method, which requires extensive expertise and consumes time. We suggest you use the Exchange to Exchange Migration Tool to avoid this. This tool has an impactable record for migrating Exchange Server data to the Exchange Server. This tool helps to automate the migration process.
Software Prerequisites to Migrate Mailboxes from Exchange 2010 to 2019
- The destination admin account should already have the destination user or users created.
- Users should whitelist the SysTools Customer Management domain in their network firewall.
- Installing the most recent version of Microsoft Visual C++ Redistributable (Visual Studio 2015, 2017, 2019, and
- 2022) is recommended. Get in touch
- Please ensure you are impersonating the source and target servers’ admin accounts. Continue reading…
- Exchange Servers Should be located on-site or on the premises.
- The Exchange Server should have the “Microsoft Exchange Information Store” service running.
- The SAM email address should be used for Exchange users.
- Proxy settings shouldn’t block the network call.
- An antivirus shouldn’t block the application.
After following this step you have done the prerequisite to migrate Exchange from 2010 to 2019.
Quick Software Steps to Follow to Migrate Exchange Server 2010 to 2019
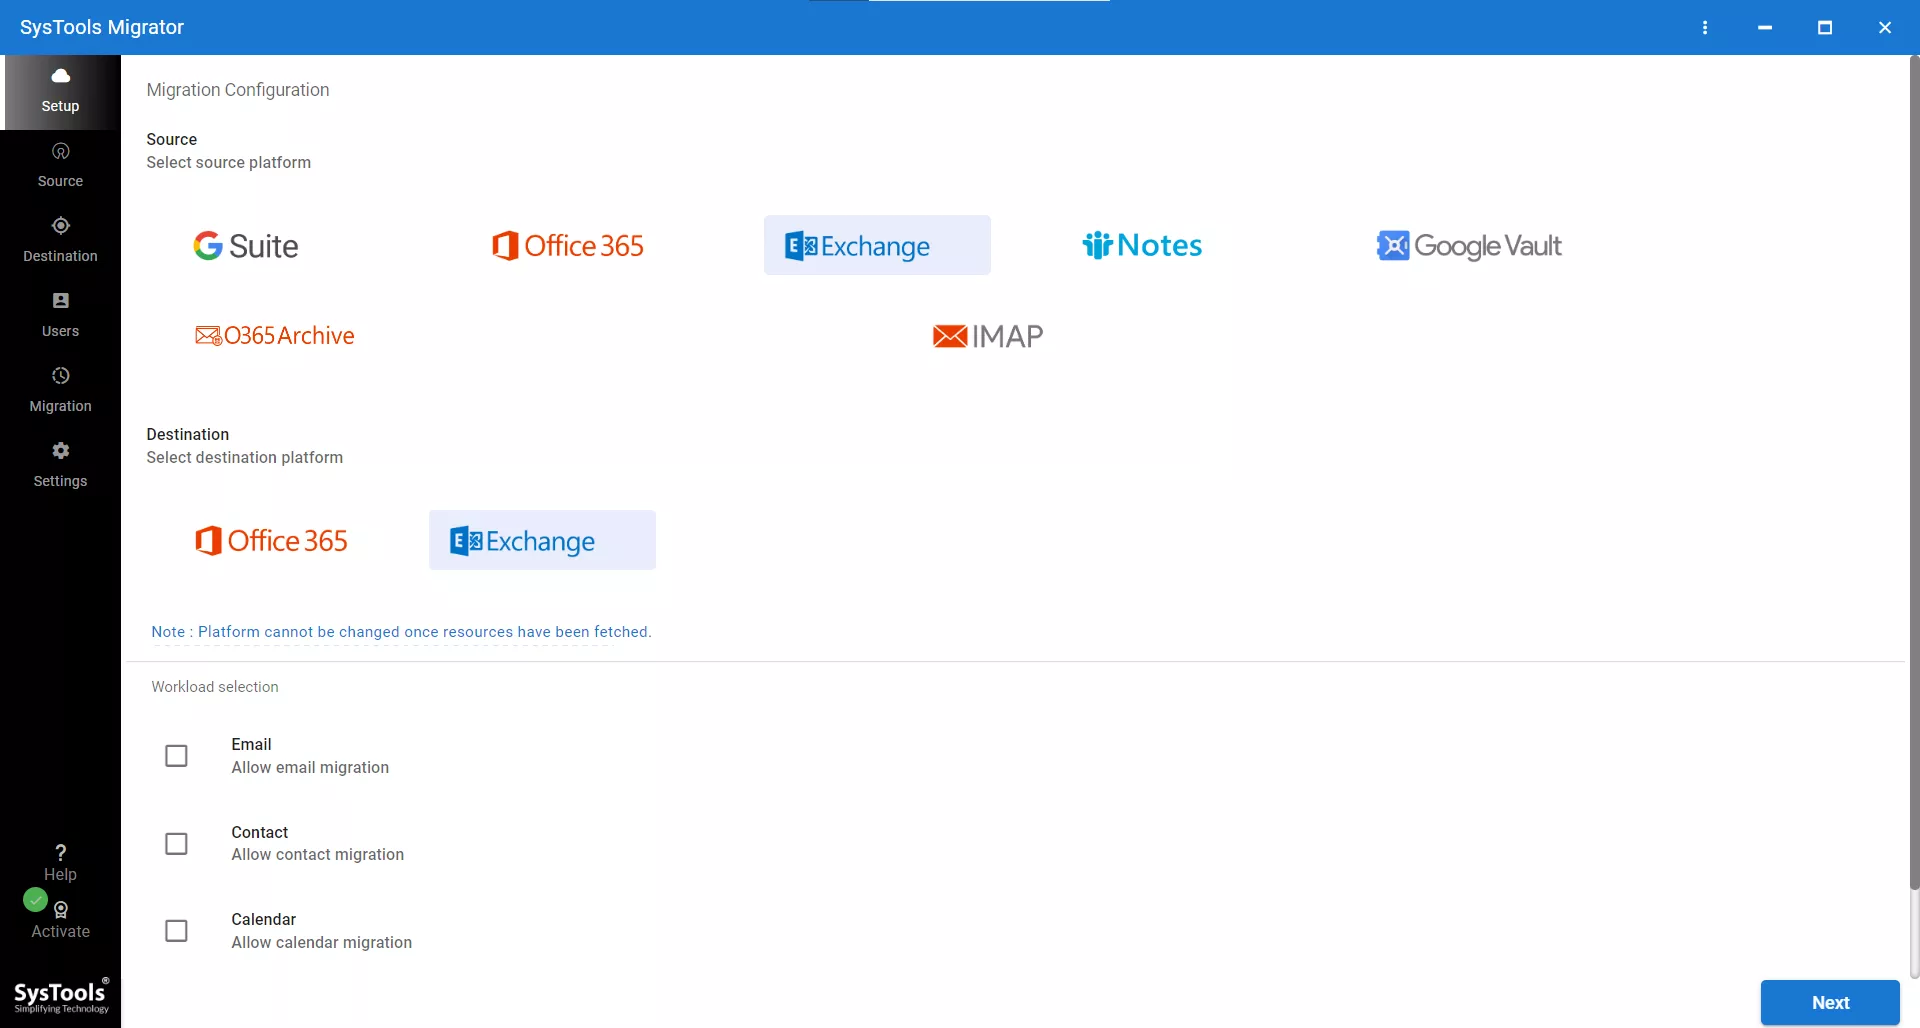
Step 1. Download and install the software from the above button. Choose Exchange as both the source and destination.
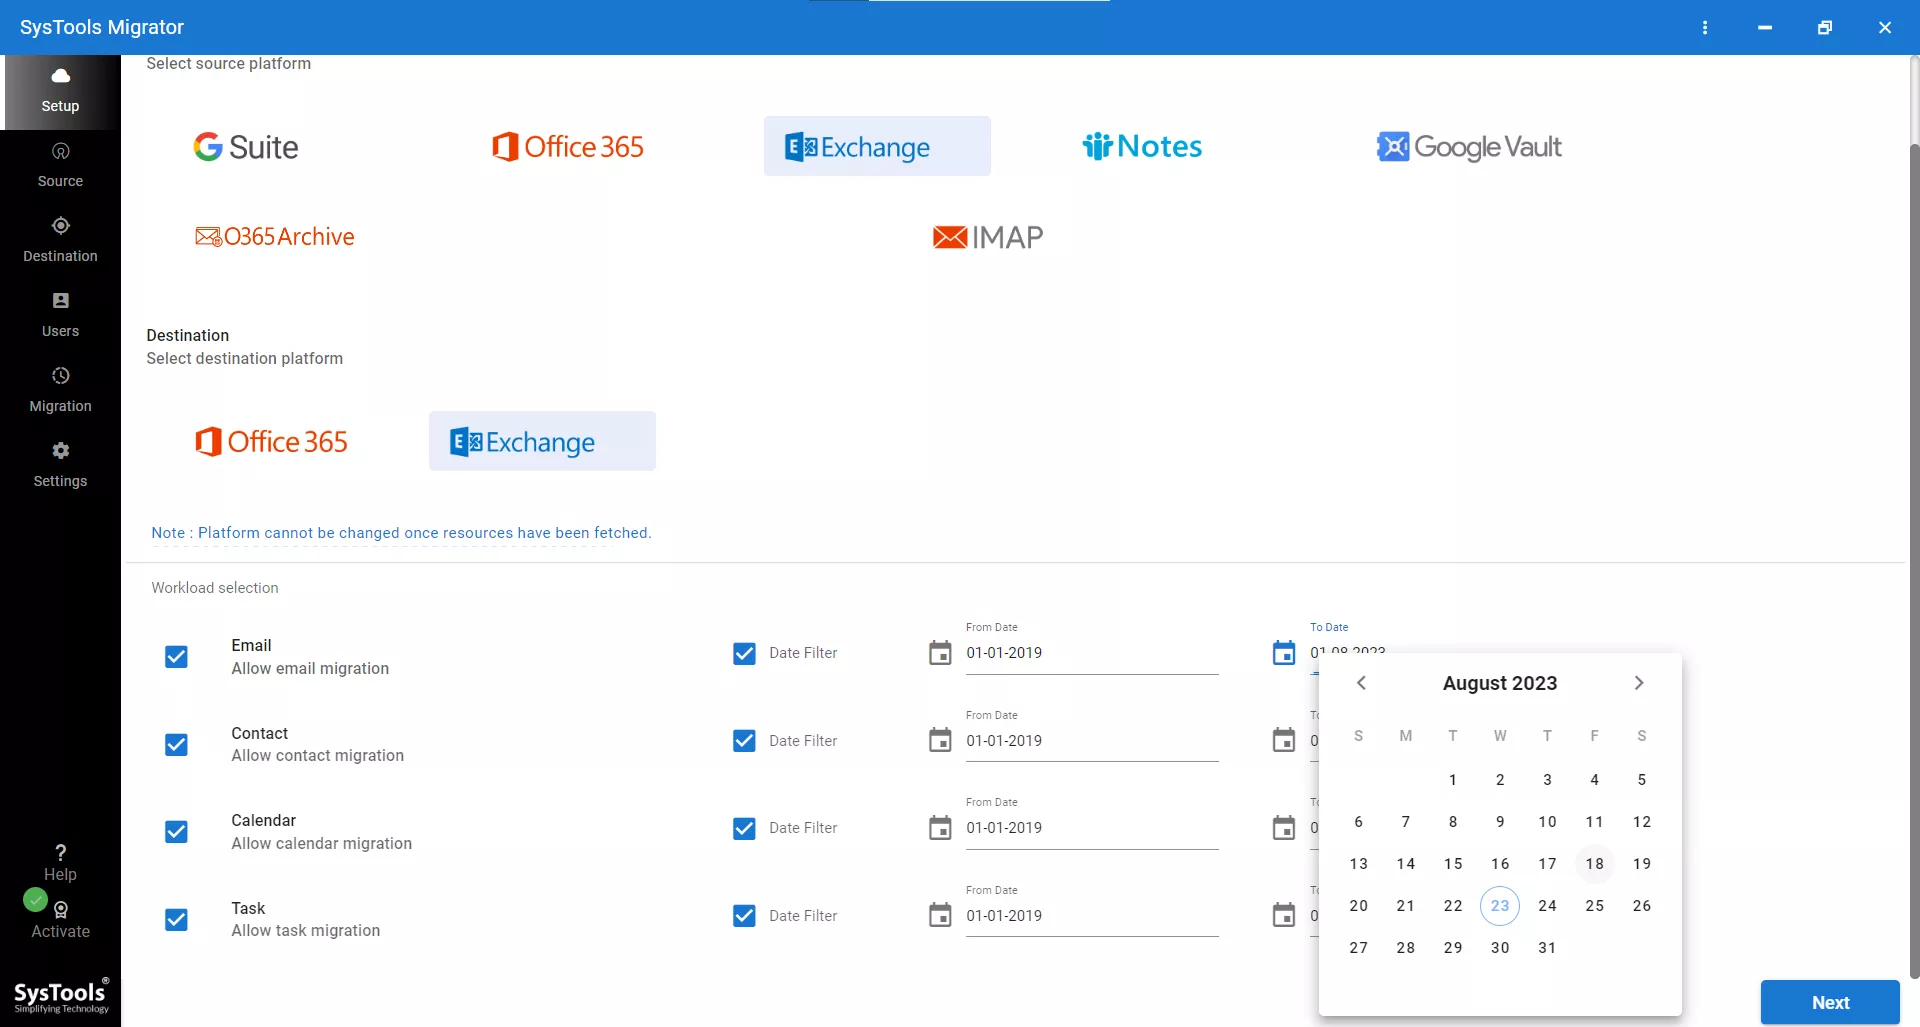
Step 2. Select desired categories and apply date filters for data migration.
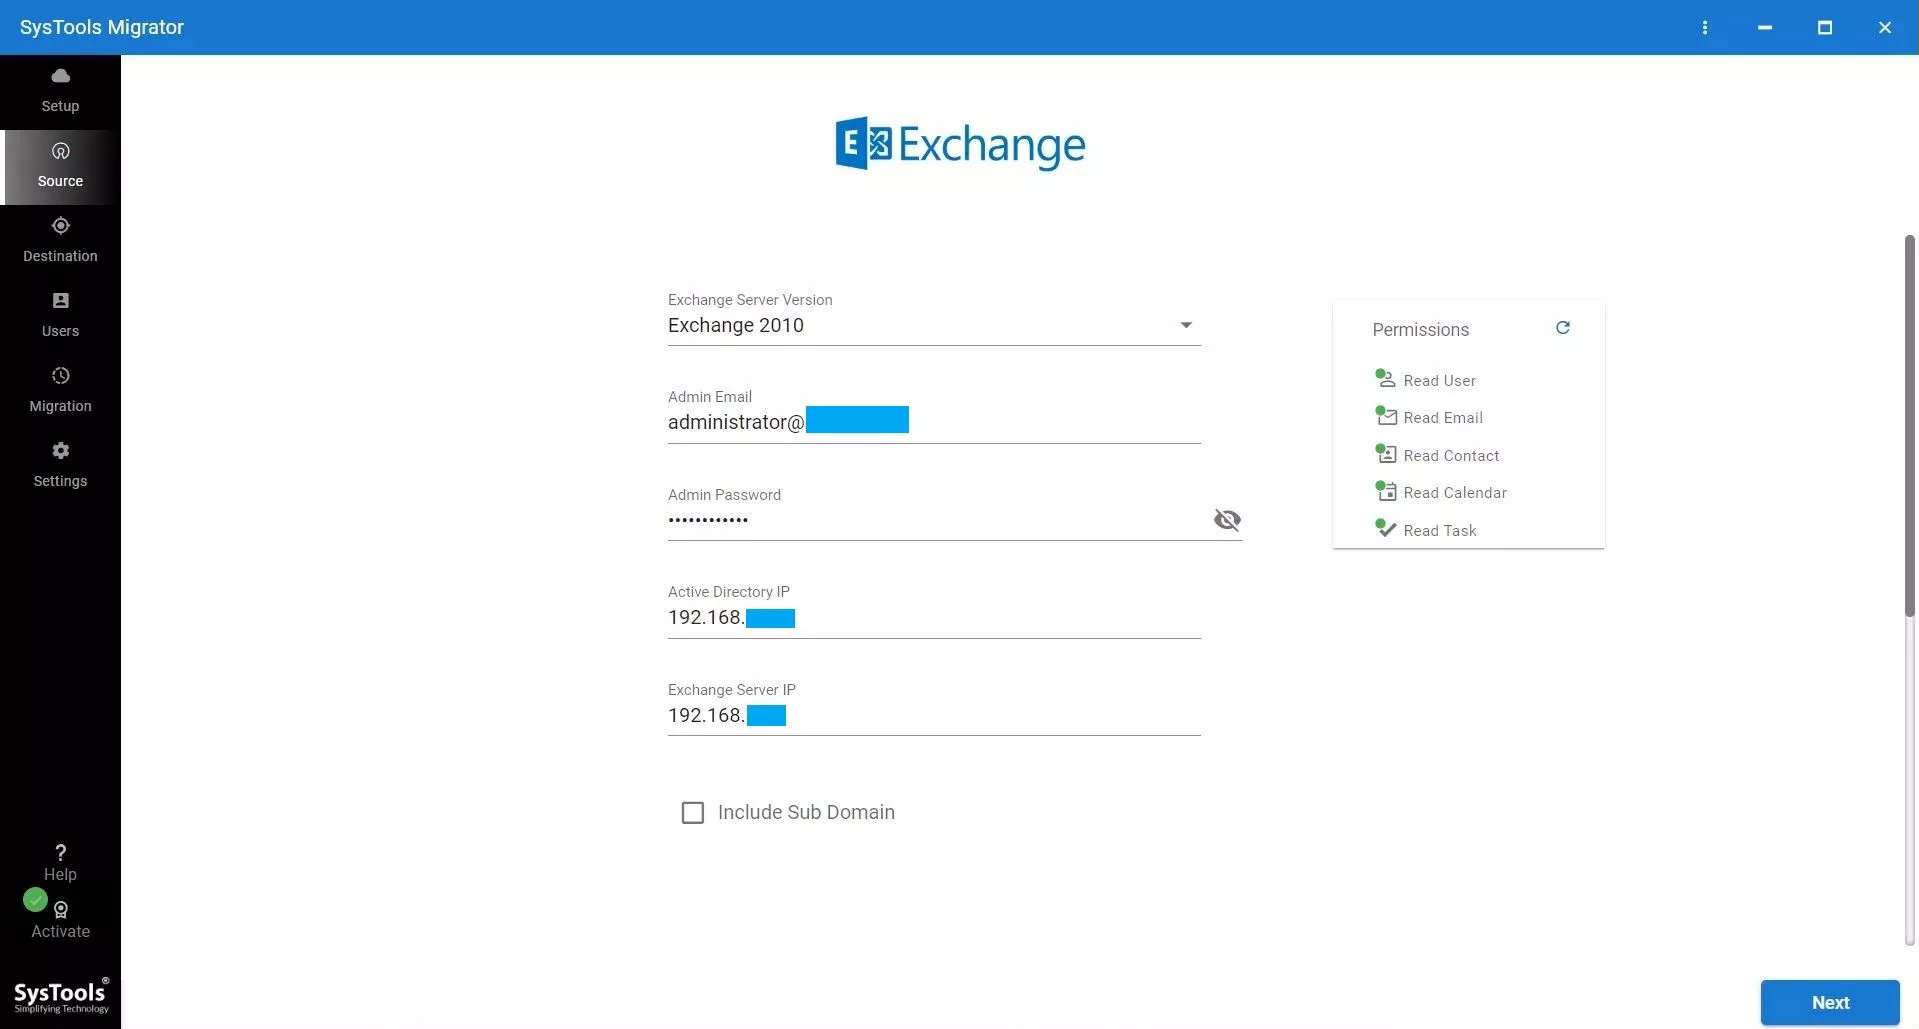
Step 3. Enter the required details for the source Exchange Server (e.g., Admin Email, Admin Password, Active Directory IP, Exchange Server IP).
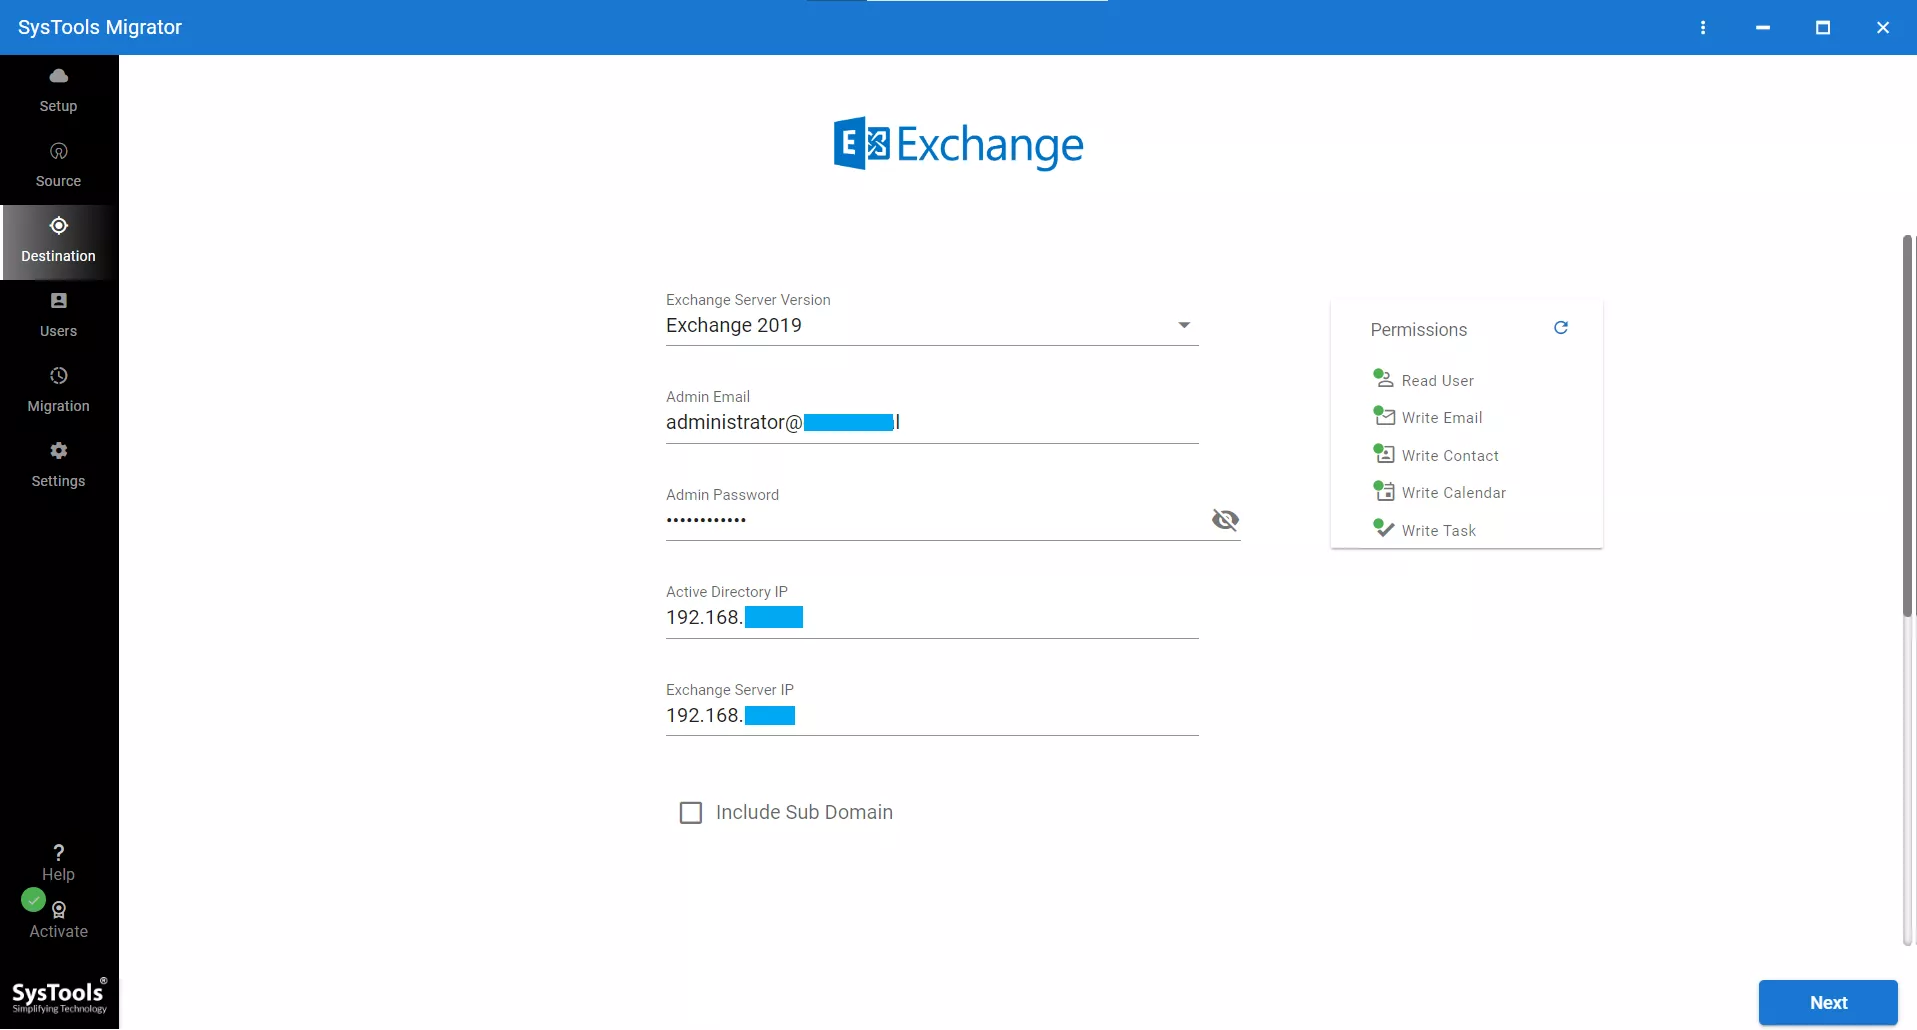
Step 4. Enter details for the destination Exchange Server (e.g., Exchange Server Version, Admin Email, Admin Password, Active Directory IP, Exchange Server IP).
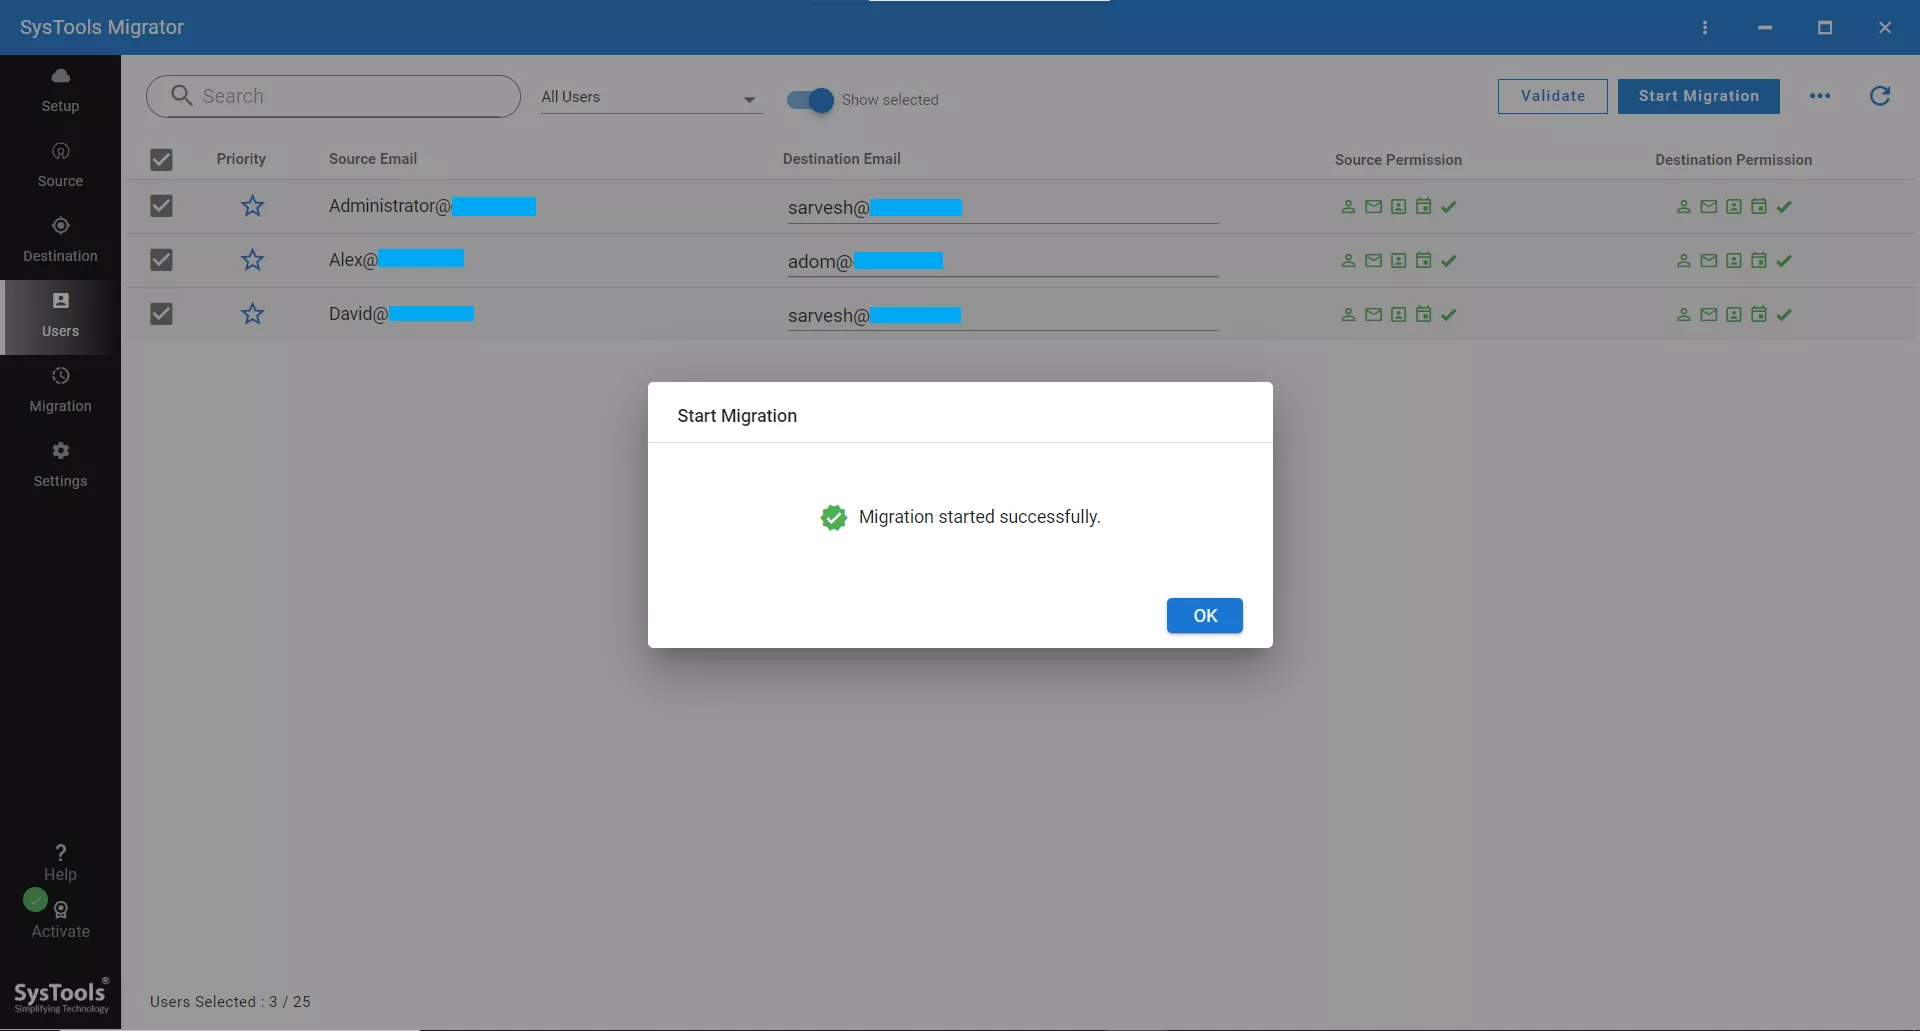
Step 5. Create mapping, validate permissions, select users, and start migration.
Conclusion
Migrating Exchange 2010 to 2019 manually cloud be a daunting task, as it requires you to migrate to 2016 first, then upgrade to Exchange Server 2019. However, if you follow the suggested method and leverage the above software then you can directly migrate Exchnage 2010 to 2019.