Learn Why Imported ICS is Not Showing In Outlook 365? A Step-by-Step Guide!
Outlook is a popular email client that provides many customization options it features emails, contacts, to-do, and calendars. However, a user can import and export emails, calendars, events, and contacts into a local device/system easily in available formats like PST for Emails, VCF for Contacts, and ICS for Calendars. It provides a promising solution for organizations to collaborate. However, sometimes users may face problems in importing and exporting emails and calendars. Nowadays an uncommon problem a user can face is “Imported ICS not showing in Outlook 365”.
I am currently working as an Office 365 Admin in my organization. Where scheduling meetings is common and tracking records of meetings is also necessary. So, I have uploaded an old calendar file but now the Imported ICS is not visible. Even though I have tried to search the imported file with its name. Is there any way to resolve this issue?
—Edward Parkinson
Prerequisites Steps For Events Not Appearing After Uploading ICS Calendar
If you are facing this problem, we are assuming that you already know the steps for adding a locally stored calendar. However, there might be an error in adding that you haven’t noticed while Uploading the file. To be on the safe side we are going to show steps for adding the ICS calendar file in Outlook 365. After that, we will show the steps for your query regarding Imported ICS not showing in Outlook 365 or Office 365.
Note: it is important to follow the given steps to be on the safe side
Steps For Uploading Locally Stored Calendar File
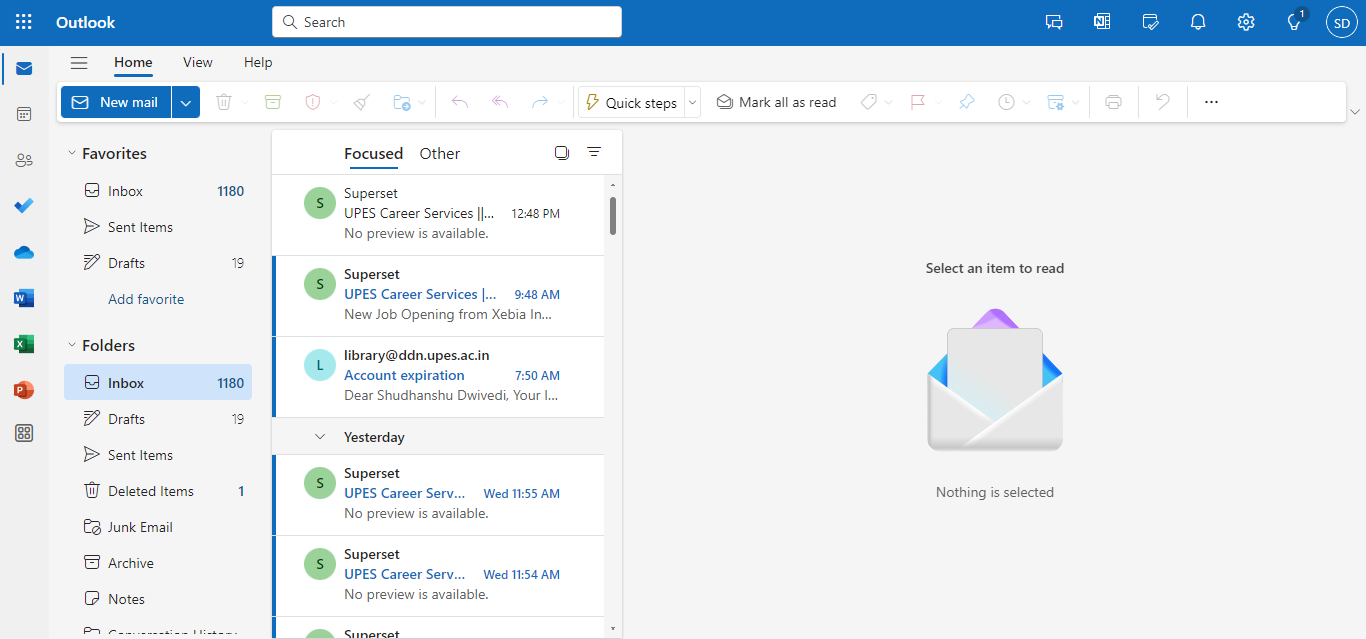
Step 1. Go to Office 365 Open the Outlook(on the web) application the window will look like this.
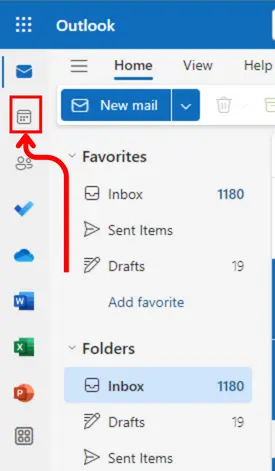
Step 2. Navigate to Calendars located in the left navigation bar
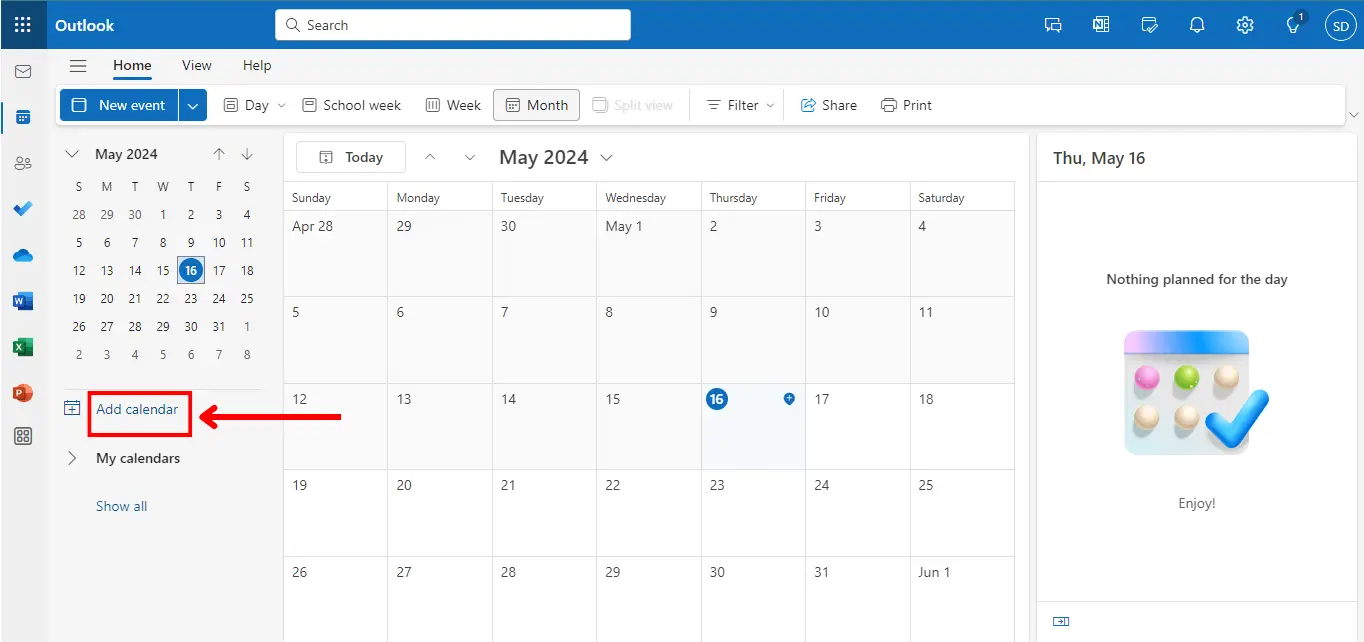
Step 3. Click on “Add Calendar” in the left pane
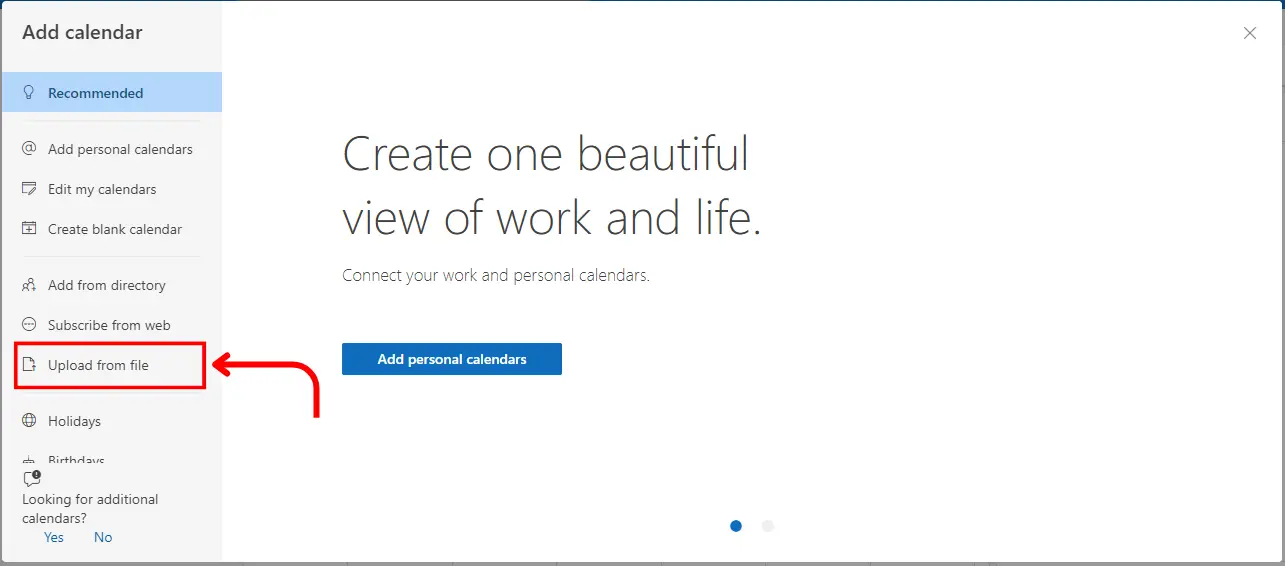
Step 4. Now click on “Upload from a file” located in the left tab
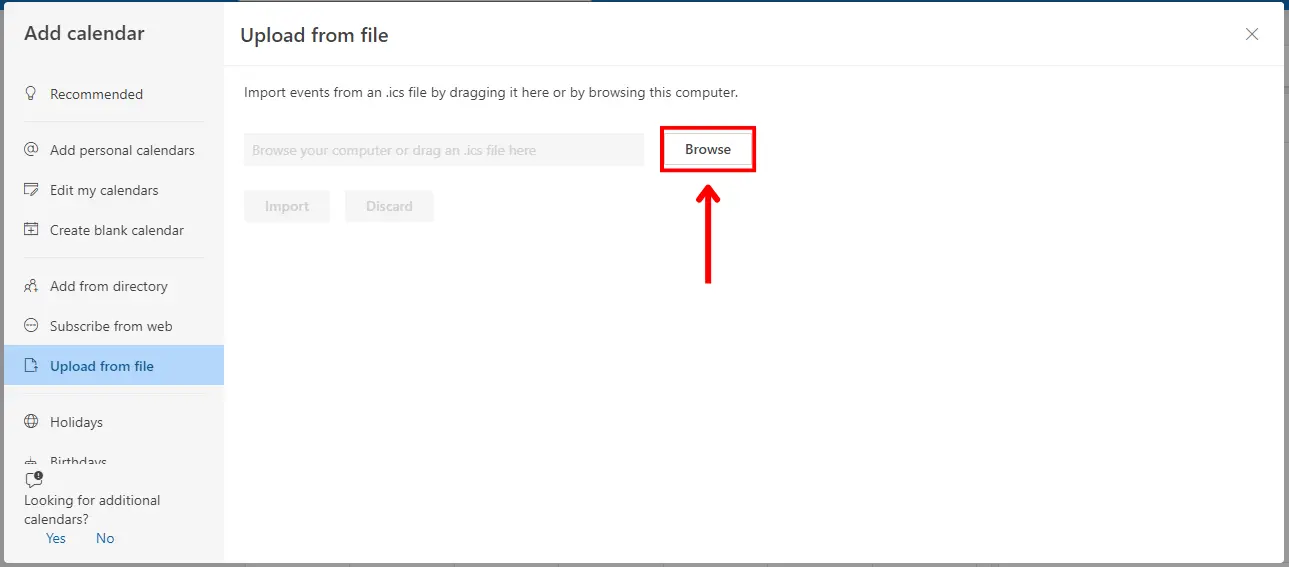
Step 6. Browse the file to import
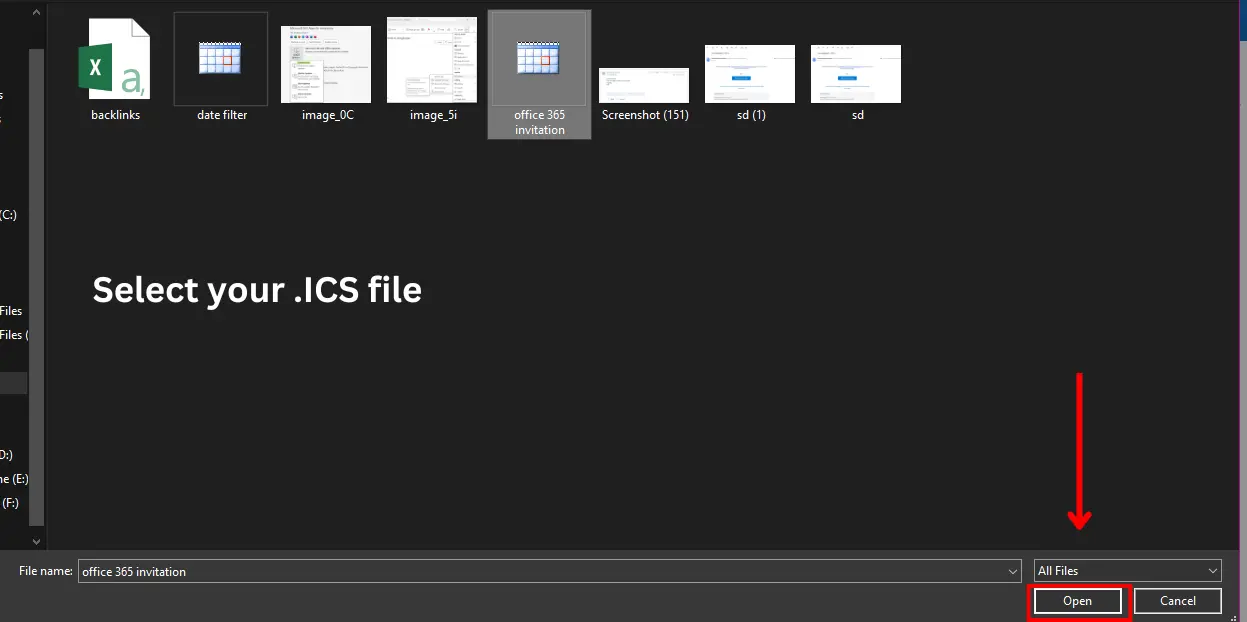
Step 7. Select the ICS file and click on open.
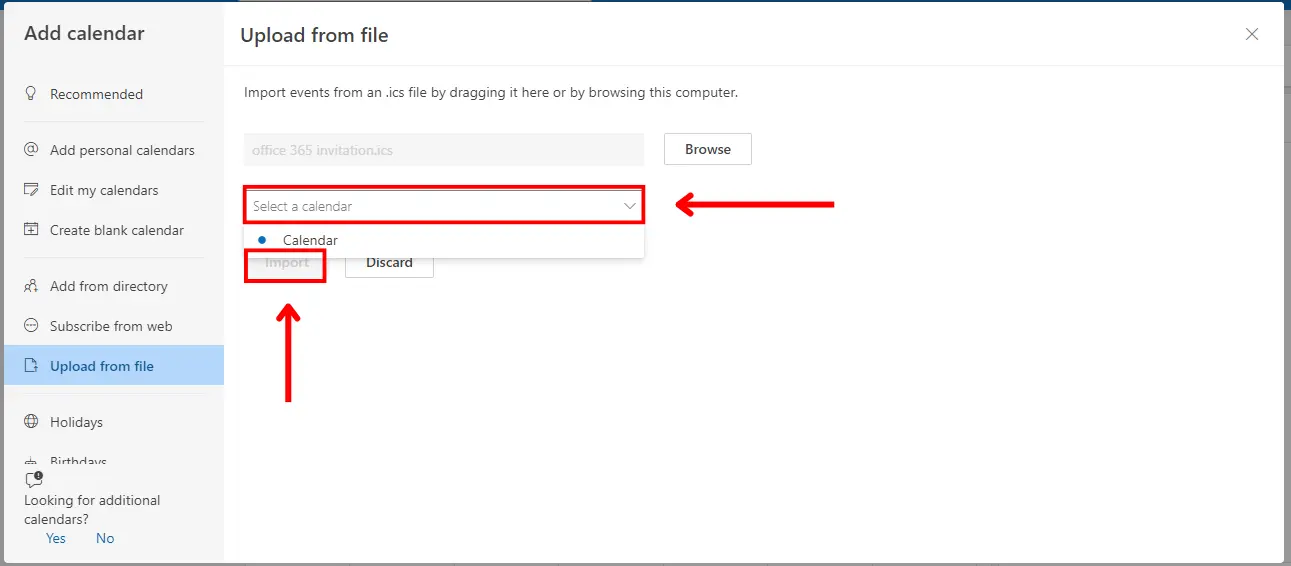
Step 8. Select the calendar and click on Import.
Step 9. Verify the successful imported message

By following these steps you have successfully added the calendar.
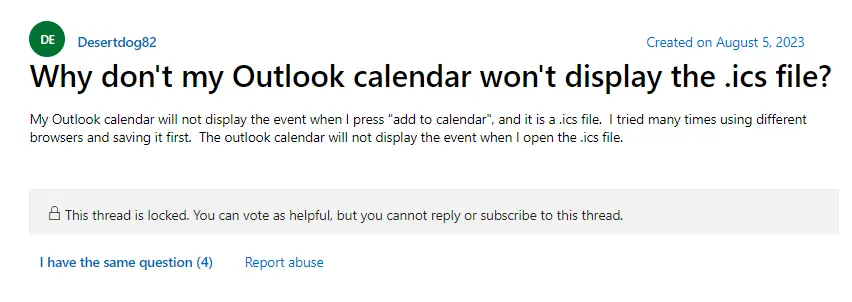
Now, let’s see a user query in the below image and the steps to check the issue regarding imported ICS not showing in Outlook 365.
Steps to Resolve Imported ICS Not Showing in Outlook 365
Image representing the Problem when a user searches the name of the calendar but does not find it in the calendar.
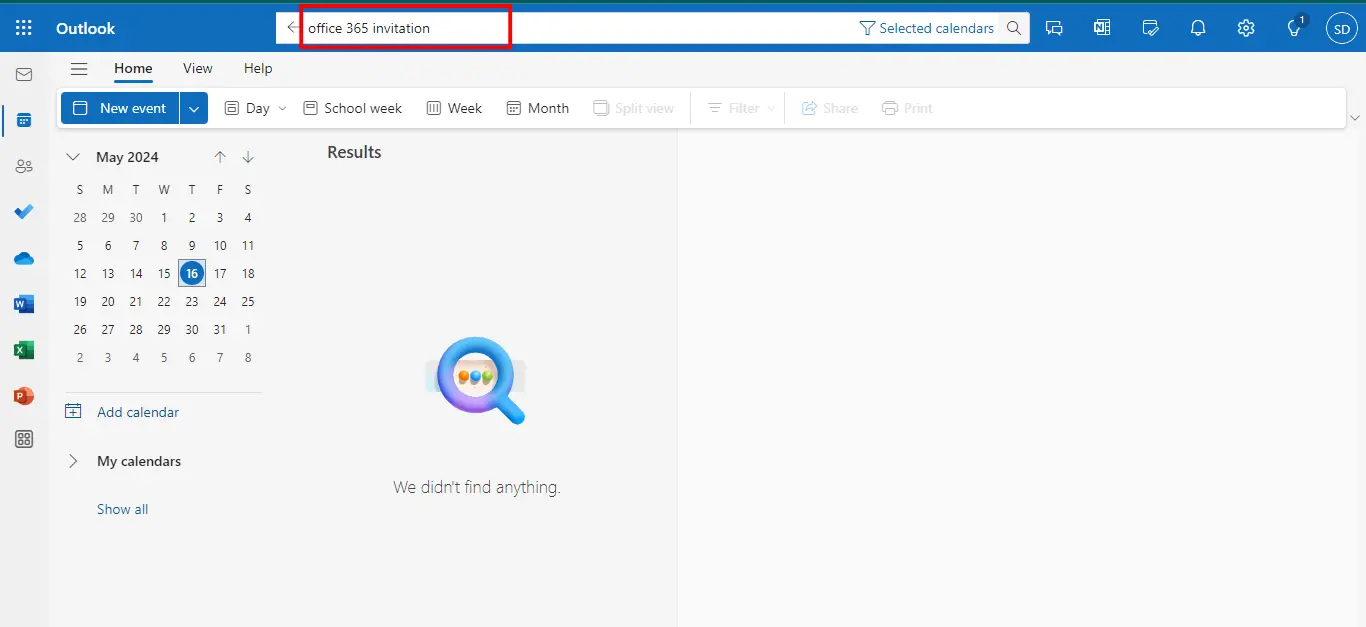
However, this is not a problem this is an issue of checking the calendar on the last updated date but the event is scheduled on another date. To find the date when your event was scheduled you need to follow the steps
Steps to check Past Scheduled Events in ICS:
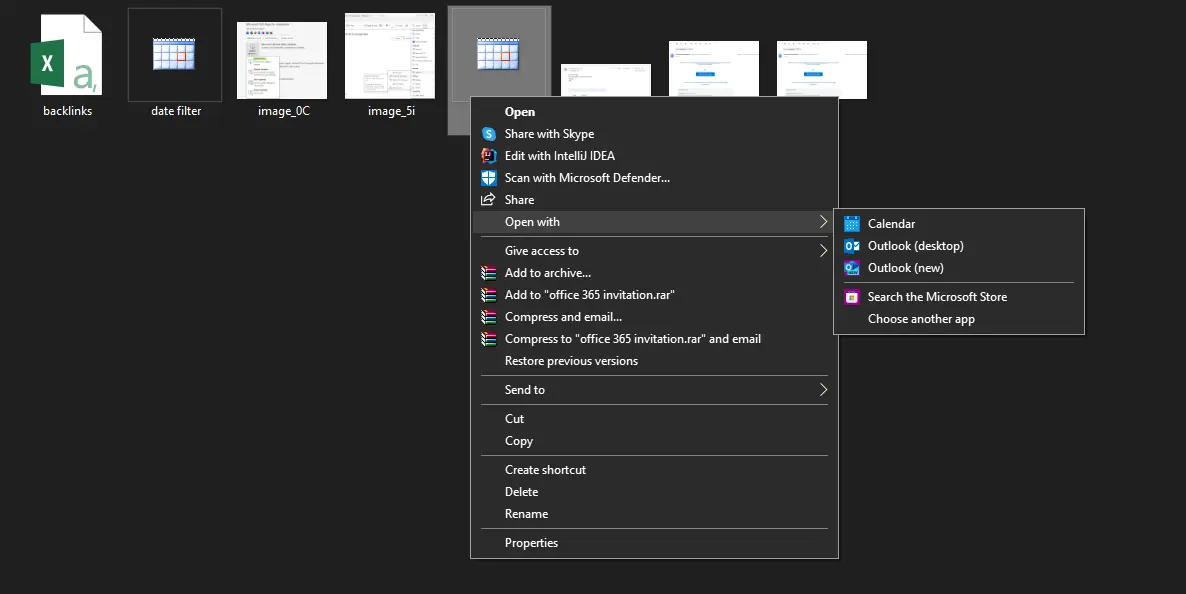
Step 1. Go to your ICS file then right-click on that file and select “Open with”.
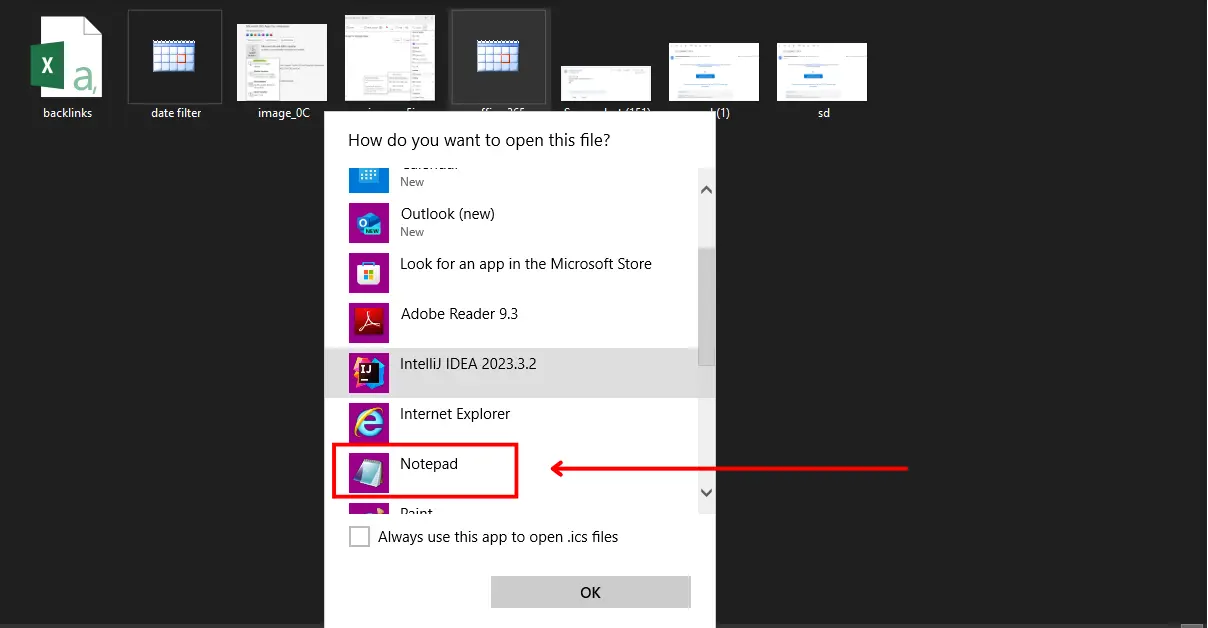
Step 2. Open this file with a Notepad.
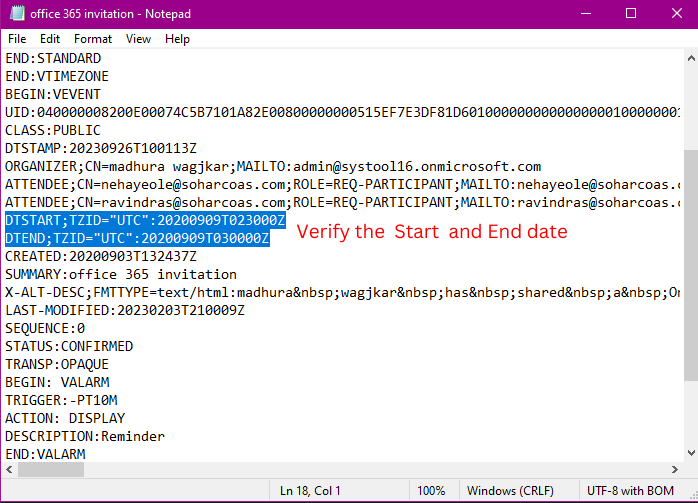
Step 3. Verify the start date and end date of the calendar (start with the year 2020, and 2019 in a center month like 009=09 and in the end date 023=23).
Step 4. Navigate to Outlook on the web>> Go to search >> Enter the file name in the date filter>> Select a date before your start date in the date filter.
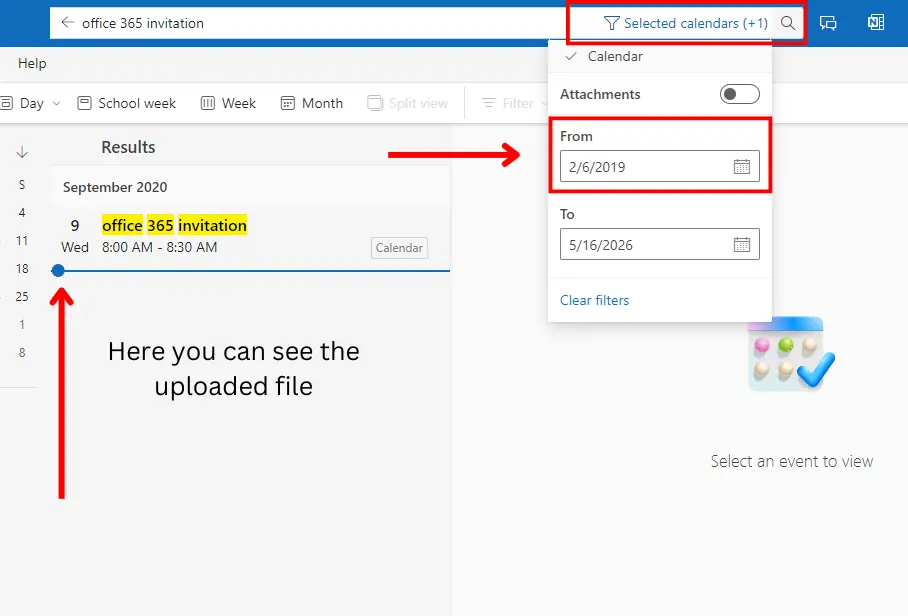
Step 5. Finally, you can able to see the event in the Calendar on a specific date (start date).
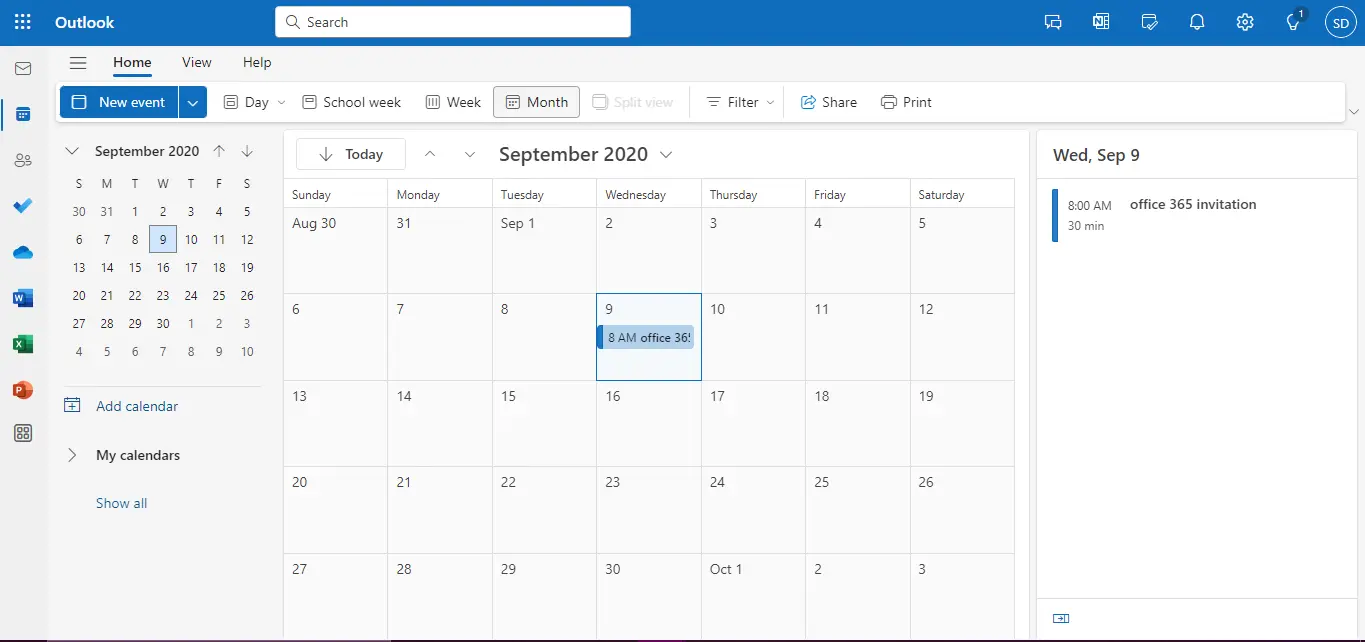
Hence, your problem regarding Imported ICS not showing in Outlook is solved. Let’s see another prominent method for uploading calendars in Outlook. if
An Efficient Method to Import All Your Locally Stored Files
After fixing the issue you might be concerned that importing 1 file for one user can take 5 minutes and if you have to import 1000 ICS files for 1000 users whose data is in separate folders. So what 5*1000 minutes?
No! here we suggest an efficient and effective solution that can help you solve the issue regarding uploading calendar files. Many IT professionals recommend the Import ICS to Office 365 this tool can automate the process of importing bulk PST.
Steps For Importation Using the Mentioned Tool
After the successful resolution of your query regarding imported ICS not showing in Outlook. Let’s see the steps to seamlessly import your calendar data files.
Step 1. First, choose “File System” as the source platform and “Office 365” as the destination platform.
Step 2. Under Workload Selection, select the calendar from the categories that were imported into Office 365.
Step 3. The Date-Range Filter option allows you to import mailbox data based on a certain date range selectively. Click Next.
Step 4. You will now be taken to the Source screen, where you must select the path to the Outlook PST files folder.
Step 5. You must place these files in the appropriate directories (named after the target O365 or Microsoft 365 email IDs), as specified below:
- Firstly, create a folder on the root drive, such as:
- Secondly, go to the drive where you saved your data.
- Thirdly, create an ICS folder on the drive.
- Finally, select the folder “E:/ICS/” as the “Import Folder Path”.
Step 6. Click Validate to check that the proper permissions are granted to the files.
Step 7. Permission should be provided to the originating platform. Click Next.
Step 8. Fill out the Office 365 admin email account and application ID for the destination.
Step 9. Click Validate to check that the credentials provided are correct.
Step 10. After validation, permissions will be granted to the admin account. Click Next.
Step 11. On the Users screen, numerous options exist for adding users from the source account who need to be processed.
Step 12. Select on fetch users
Step 13. Click on validate
Step 14. Click on Import
After performing these steps you can successfully import calendars to Outlook. Moreover, if you want to read more about how to migrate/ import ICS to Office 365 you can click on the link.
Conclusion
In this write-up, we have solved the issue regarding imported ICS not showing in Outlook 365. However, we have clarified that this is not an error it’s a mistake where the user checks the event on an updated date rather than even the scheduled date. Additionally, we have mentioned a solution that can save time and effort for users.


